A professional product photography setup can transform simple items into scroll-stopping visuals that boost sales and brand credibility. Whether you use a smartphone or DSLR, creating your own product photography studio at home is easier and more affordable than it seems. With the right lighting, background, and camera angles, you can capture stunning, high-quality images that look straight out of a pro studio. This guide will walk you through everything—from building a budget-friendly setup to mastering composition and editing. Perfect for small business owners, creators, and online sellers, these product photography setup tips will help you turn any small space into a powerful DIY product photography studio that showcases your products beautifully and drives conversions.
What is Product Photography
Product photography is the art of capturing high-quality images that showcase a product’s features, design, and details in the best possible light. It plays a vital role in eCommerce and digital marketing by helping customers visualize what they’re buying before making a purchase. A well-executed product photography setup uses controlled lighting, clean backgrounds, and the right camera angles to make products look appealing, trustworthy, and true to life.
Whether you’re shooting jewelry, clothing, gadgets, or handmade crafts, professional product photography can dramatically improve engagement and conversion rates by making your products stand out and tell your brand’s story visually.
Why a Proper Product Photography Studio Setup Matters
A professional product photography studio setup plays a crucial role in shaping how customers perceive your brand. High-quality images instantly capture attention, build trust, and encourage shoppers to buy. When your photos look clean, bright, and consistent, they tell customers your business is reliable and professional.
A strong product photography setup also drives better conversions. Clear lighting, well-composed shots, and a uniform background help potential buyers visualize details like color, texture, and size—making them feel confident about their purchase.
Beyond driving sales, consistency across all your photos strengthens your brand identity. Whether you’re using a smartphone or a DSLR, maintaining a cohesive studio setup ensures your online store looks polished, credible, and ready to compete with established brands.
Key Components of a Product Photography Studio Setup
Building the perfect product photography studio setup doesn’t have to be complicated or expensive. With a few essential components and smart planning, you can create a space that delivers consistent, professional-quality photos for your online store. Here’s what matters most when designing your product photography setup:
Space & Environment (Room Size, Walls, Ambient Control)
Start by choosing a space with plenty of natural light and neutral-colored walls. A small spare room or even a quiet corner works fine as long as you can control shadows and reflections. Avoid rooms with mixed lighting sources, and if possible, block out bright windows during shoots to manage light better. The goal is to create a consistent environment that allows you to focus on lighting, composition, and angles—without distractions.
Lighting Equipment (Natural vs Artificial, Softboxes, Diffusers)
Lighting is the heart of any product photography setup. Natural light is perfect for beginners—shoot near a large window with sheer curtains to diffuse harsh sunlight. For a more professional studio setup, invest in softboxes, ring lights, or LED panels to control shadows and brightness. Adding diffusers or reflectors helps balance light evenly across the product, ensuring sharp details and natural tones.
Backgrounds & Surfaces (White Sweep, Colored, Textured)
A clean background keeps attention on your product. A white paper sweep is ideal for eCommerce-style photos, while colored or textured backdrops can add creativity and personality. Use vinyl, fabric, or foam boards depending on your product type. The right studio background setup minimizes distractions, enhances contrast, and ensures your photos look consistent across your catalog.
Camera & Support Gear (Tripod, Lenses, Phone Attachments)
Whether you’re using a DSLR or a smartphone, stability is key. A tripod prevents blur and maintains consistent framing. For phones, consider using clip-on lenses or a remote shutter for more control. If you use a DSLR, experiment with macro lenses for small products or prime lenses for crisp detail. The goal is to keep every shot steady, sharp, and consistent with your studio’s setup.
Props, Reflectors, Styling Aids
Props can enhance your product photography studio setup by adding context and depth. Use minimal props that complement your product without stealing focus. Reflectors bounce light to fill shadows, while styling tools like stands, clips, or acrylic risers help you position items creatively. A few thoughtful additions can elevate a plain image into a story that captures your
Step-by-Step: Setting Up Your Studio on a Budget
You don’t need expensive gear or a large studio to capture stunning product photos. With a few smart choices, you can build a professional product photography setup right at home. Here’s how to create a clean and effective product photography studio setup without breaking the bank. You can even start product photography with your smartphone to showcase their products effectively. With the right techniques, you can capture high-quality images using just your phone.
Here are the key steps to mastering phone product photography.
1. Use a Room with Good Lighting
Lighting is crucial in product photography. Natural light works best, but proper positioning is necessary to avoid harsh shadows or overexposed areas.
- Shoot near a window for soft, even lighting.
- Avoid direct sunlight, which can create strong shadows.
- Use artificial light, such as ring lights or LED panels, if shooting in a dim room.
- Position the product at a 45-degree angle to the light source for balanced exposure.

Soft morning or late afternoon light is ideal for achieving a natural glow.
2. Choose Your Smartphone
The quality of your smartphone camera makes a significant difference in image clarity and detail.
- Choose a phone with at least a 12MP camera for sharp images.
- Ensure it has optical image stabilization (OIS) to reduce blur.
- Use Pro Mode to adjust exposure, ISO, and white balance manually.
- Enable HDR mode to capture more details in highlights and shadows.
Best smartphones for product photography include the iPhone 15 Pro Max, Samsung Galaxy S24 Ultra, and Google Pixel 8 Pro. If your phone lacks advanced camera features, consider external lens attachments for better zoom or macro shots.
3. Get a Mini Tripod
A steady camera is essential for capturing sharp product images. A mini tripod eliminates handshaking and ensures consistent framing.
- Helps prevent blurriness, esecially in low-light conditions.
- Allows hands-free shooting for easier adjustments.
- Keeps framing consistent when taking multiple shots.

Recommended mini tripods include the UBeesize Phone Tripod for flexible angles, the JOBY GorillaPod Mobile for overhead shots, and the Manfrotto PIXI Mini for tabletop product photography. If a tripod is unavailable, use a stable surface like a stack of books.
4. Set Up Your Backdrop
A clean and simple background ensures the product remains the focal point without distractions.
- Use a white or neutral backdrop for a professional appearance.
- Try colored backgrounds to match branding or aesthetic preferences.
- Use seamless paper rolls or foam boards for a smooth background.
- Position the backdrop at an angle to avoid visible folds or creases.
Popular backdrop choices include white poster boards for a minimalist look, wooden textures for a rustic feel, and acrylic sheets for a premium effect. Avoid cluttered backgrounds that distract from the product.
5. Use a White Bounce Board
Bounce boards help control shadows and distribute light evenly across the product.
- Place a white foam board or reflector opposite the light source to bounce light back onto the product.
- Eliminates harsh shadows and ensures a balanced exposure.
- Enhances details and softens the overall look.

DIY alternatives include using a white cardboard sheet, aluminum foil-covered boards for extra brightness, or silver reflectors for better light diffusion. Multiple bounce boards can be used to adjust shadows from different angles.
6. Set Up a Diffuser Sheet if the Sun is Too Bright
If shooting with natural light, excessive brightness can cause unwanted reflections and overexposure. A diffuser softens the light and prevents extreme contrast.
- Hang a white bedsheet or sheer curtain over the window to diffuse sunlight.
- Use a softbox diffuser for artificial lights.
- Cloudy days naturally diffuse sunlight, making them ideal for product photography.
Recommended diffuser options include the Neewer Softbox Diffuser Kit for even lighting or a DIY option using a white shower curtain or parchment paper. Adjust the diffuser’s position to achieve even lighting on the product.
How to Use Natural Lighting for Product Photography
Natural lighting is one of the easiest and most cost-effective ways to capture high-quality product photos. When used correctly, it enhances details, creates soft shadows, and makes images look professional.
How to get the best results using natural light is explained below:
1. Pick the Best Time for Shooting
The time of day affects how your product looks under natural light.
- Golden Hour (Morning & Evening): Soft, balanced light reduces harsh shadows and adds warmth.
- Midday Sun (Avoid Direct Light): Creates strong shadows and overexposure. Use diffusers or find shade.
- Cloudy Days: Ideal for even, soft lighting without harsh contrasts.
2. Position Your Product Near a Window
For indoor shoots, place your product close to a north- or south-facing window for consistent lighting.
- Avoid direct sunlight to prevent strong highlights and shadows.
- Position the product slightly off to the side of the window for even lighting.
- Try different angles to find the best balance of light and shadow.
3. Use Reflectors and Bounce Boards
Since natural light comes from one direction, use reflectors to soften shadows and brighten dark areas.
- White Foam Board: Bounces light back onto the product for a softer look.
- Silver Reflectors: Intensifies natural light and adds brightness.
- DIY Option: White cardboard, aluminum foil, or even a plain white wall can work.
4. Choose the Right Background & Surface
Your background should complement the product and work well with natural light.
- Stick to neutral colors like white, gray, or soft pastels for a clean look.
- Matte whiteboards or wooden textures reflect light well and enhance the product.
- Avoid glossy or reflective surfaces that cause unwanted glare.
5. Experiment with Lighting Angles
The position of natural light affects how shadows fall on your product.
- Side Lighting: Adds depth and dimension.
- Front Lighting: Reduces shadows but may make the image look flat.
- Backlighting: Creates a glowing effect but may require adjustments to maintain product visibility.
6. Use a Diffuser for Harsh Sunlight
On bright days, direct sunlight can cause overexposure. A diffuser softens the light and spreads it evenly.
- Place a white sheet, sheer curtain, or parchment paper over the window.
- Use a softbox diffuser for artificial lights.
- If shooting outside, position the product in a shaded area to reduce harsh light.
7. Test Shots & Adjustments
Even with the right setup, small adjustments may be needed.
- Take multiple shots from different angles and review how light interacts with the product.
- Adjust the reflector, background, or product position to improve the lighting.
- Check exposure settings to avoid overexposed or underexposed areas.
Best Camera Angles for Product Photography
Choosing the right camera angle for product photography can significantly impact how your product is perceived. Different angles highlight various aspects of a product, influence customer perception, and enhance visual appeal.
Below are the best camera angles to use for product photography and when to apply them.
1. Eye-Level Angle
This is the most neutral and realistic angle, showing the product as the customer would see it in real life.
- Best for electronics, packaged products, and items meant to be viewed straight-on.
- Creates a trustworthy and accurate representation of the product.
- Works well for eCommerce product listings where clarity is essential.
Example: A smartphone photographed at eye level to showcase its sleek design and interface.
2. Flat Lay (Top-Down) Angle
A 90-degree bird’s-eye view is often used for styled product shots and arrangements.
- Best for clothing, food photography, cosmetics, and products with multiple components.
- Creates a clean, organized, and visually appealing composition.
- Ideal for social media content, website banners, and flat-lay marketing visuals.
Example: A coffee setup with a cup, coffee beans, and accessories arranged neatly from above.
3. 45-Degree Angle
A versatile angle that mimics a natural viewpoint slightly above the product.
- Best for footwear, small gadgets, and home decor items.
- Provides depth and dimension, making the product appear more lifelike.
- Works well when showcasing multiple features in one shot.
Example: A pair of sneakers photographed at 45 degrees to display both the top and side details.
4. Macro Close-Up Angle
A detailed shot that focuses on the texture, material, and fine details of the product.
- Best for jewelry, fabric, handmade crafts, and luxury items.
- Highlights craftsmanship and quality, building customer trust.
- Requires good lighting and a steady camera setup to maintain sharpness.
Example: A gold necklace shot up close to showcasing intricate design details.
5. Side Angle
A profile view that shows the depth, thickness, and structural elements of a product.
- Best for furniture, footwear, bottles, and fashion accessories.
- Emphasizes shape and design elements that are not visible from the front.
- Works well for products that have an interesting side profile.
Example: A high-heeled shoe photographed from the side to showcase its silhouette.
6. Low Angle (Hero Shot)
An angle taken from below, makes the product appear larger and more dominant.
- Best for luxury items, automobiles, tech gadgets, and branded items.
- Creates a powerful, dramatic, and premium look.
- Works well for advertising campaigns and promotional images.
Example: A wristwatch shot from a low angle to make it appear prestigious and high-end.
7. Over-the-Shoulder Perspective
Capturing a product as if someone is interacting with it.
- Best for tech gadgets, gaming equipment, and lifestyle products.
- Adds a storytelling element, showing the product in action.
- Engages viewers by making them feel part of the experience.
Example: A laptop photographed over the shoulder with a person typing on it.
8. Rear or Back Angle
Highlights the back details of the product that might be important to buyers.
- Best for electronics, apparel, and packaging designs.
- Shows unique branding, labels, or product features often missed in front shots.
- Works well when combined with multiple-angle shots for a complete view.
Example: A backpack photographed from the back to highlight the storage compartments.
How to Shoot Phone Product Photography
Taking great product photos with your phone is easier than ever with the right setup. Here’s how to do it like a pro:
- Find Good Lighting: Natural light works best. Shoot near a window or use soft LED lights to avoid harsh shadows.
- Use a Stable Surface or Tripod: A mini tripod keeps your shots steady and sharp. If you don’t have one, rest your phone on a stable surface.
- Choose the Right Background: Use a clean white backdrop or a background that complements your product. Avoid clutter.
- Adjust Camera Settings: Use Pro Mode if available to control exposure and focus. Enable HDR for balanced lighting.
- Try Different Angles: Experiment with flat lays, 45-degree angles, or close-up shots to highlight product details.
- Use Reflectors: A white foam board or even a piece of paper can help bounce light and reduce shadows.
- Edit Your Photos: Apps like Lightroom or Snapseed can enhance brightness, contrast, and sharpness for a professional finish.
With the right setup and a bit of practice, you can capture high-quality product images using just your phone.
Editing & Post-Production for Studio-Quality Product Shots
Once you’ve finished shooting, post-production is where your product photography setup truly comes to life. Editing refines your images, enhances colors, and gives them a clean, professional polish that matches your brand aesthetic. Whether you’re using a smartphone or a DSLR, thoughtful editing ensures your photos look consistent, balanced, and ready for your online store.
Essential Apps and Software for Editing
You don’t need expensive tools to get studio-quality results. There are plenty of user-friendly apps and professional programs that streamline your editing process:
- Adobe Lightroom – Perfect for adjusting brightness, color balance, and tone.
- Photoshop – Ideal for detailed retouching, removing imperfections, or composite shots.
- Canva – Great for quick edits, resizing, and social media formatting.
- Snapseed and VSCO – Excellent mobile apps for editing product photos on the go.
- Smartli – An AI-powered content and image enhancement platform that helps you refine, describe, and optimize your visuals effortlessly. With Smartli, you can automatically remove backgrounds, retouch imperfections, and maintain consistency across all your product listings.
Post Production Workflow: Export, Background Removal, Retouching, Batch Edit
A professional product photography studio setup goes beyond capturing the shot — it’s also about maintaining an efficient editing workflow:
- Export High-Resolution Files: Always save your images in a high-quality format (JPEG or PNG) before editing to preserve detail.
- Background Removal: Use tools like Smartli’s Background Remover or Photoshop’s selection tool to cleanly isolate products. This makes your listings look sleek and professional.
- Retouching: Correct color imbalances, remove dust, and even out shadows while keeping the product’s natural texture intact. Avoid over-editing; authenticity builds trust.
- Batch Editing: For eCommerce stores with multiple items, consistency is key. Use Lightroom or Smartli to apply the same preset or filter to all your photos for a cohesive brand aesthetic.
- Export for Web: Optimize images for faster load times without losing clarity — a must for online conversions and SEO.
Conclusion
A great product photography setup doesn’t have to be expensive or complicated — it just needs the right lighting, background, and consistency. Whether you’re using a phone or a DSLR, a well-organized product photography studio can transform your visuals and boost your brand’s credibility. Remember, quality images attract clicks, build trust, and increase sales. Once you’ve captured your shots, make them shine with Smartli — your all-in-one AI tool for background removal, image enhancement, and content optimization. Start using Smartli today to turn your photos into powerful visuals that sell more and look truly professional.
Best Apps for Product Photography
Smartphone apps have become essential for high-quality product photography, offering advanced editing, background removal, and AI-powered enhancements.
Here are the best product photography apps with their features, pros, and cons.
1. Adobe Lightroom Mobile
Adobe Lightroom Mobile is A powerful app with advanced editing tools, RAW support, and AI-powered enhancements for professional-level product photography.

Features
- Manual adjustments for exposure, contrast, and color correction.
- RAW photo editing for high-quality product images.
- AI-based preset recommendations for quick editing.
- Healing brush to remove unwanted objects.
Pros
- High-quality color correction and tone adjustments.
- Supports RAW images for better editing control.
- Cloud sync is available for cross-device access.
Cons
- Subscription-based (free version has limited tools).
- Advanced tools have a learning curve for beginners.
2. Snapseed
Snapseed is a free, professional photo editor developed by Google, great for quick enhancements and precise adjustments.

Features
- Over 29 editing tools, including curves, white balance, and perspective.
- Selective editing to fine-tune specific areas.
- RAW file editing support.
- One-tap filters for quick editing.
Pros
- Free with no hidden costs.
- Advanced tools without compromising image quality.
- User-friendly interface for all skill levels.
Cons
- No cloud storage integration.
- Lacks AI background removal.
3. Pixlr
Pixlr is a lightweight, AI-powered editing app with quick tools and creative effects for product photography.

Features
- AI Cutout Tool for easy background removal.
- One-tap corrections for lighting, sharpness, and color.
- Layer editing to create composite product images.
- Pre-set Instagram-style filters and overlays.
Pros
- Quick and easy to use for beginners.
- AI-powered tools for faster editing.
- Supports layer-based editing for product mockups.
Cons
- Lacks advanced manual controls for detailed editing.
- Some features require a premium upgrade.
4. PhotoRoom
PhotoRoom is the best for background removal and product photography for eCommerce, ideal for online sellers.

Features
- AI-powered background remover with one tap.
- Over 100 templates for eCommerce, marketing, and branding.
- Batch editing for multiple product images at once.
- Smart shadows and reflections for realistic product shots.
Pros
- Best app for clean background removal.
- One-tap eCommerce photo optimization.
- Easy to use, even for non-designers.
Cons
- Premium subscription is required for high-resolution exports.
- Limited manual editing tools.
5. Halide
Halide is a professional camera app offering full manual control for photographers who want to capture product images with precision.
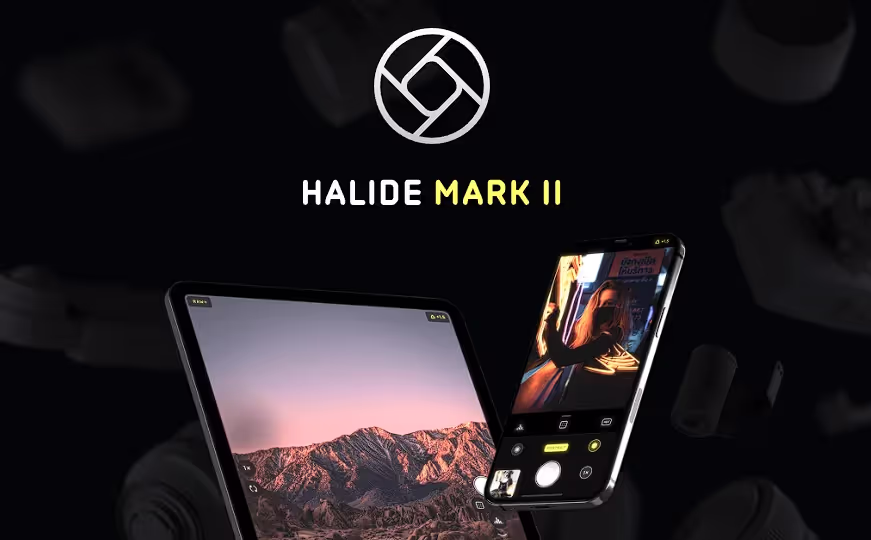
Features
- Manual focus, ISO, and shutter speed adjustments.
- ProRAW and Deep Fusion support for Apple devices.
- AI-based Smart HDR for better lighting control.
- Histogram and focus peaking for professional compositions.
Pros
- Great for high-end product photography.
- Captures natural, unprocessed images for later editing.
- Works well with external lenses for macro shots.
Cons
- Only available for iOS.
- No built-in editing tools.
Mistakes To Avoid With Phone Product Photography
Capturing high-quality product photos with a phone is easy, but common mistakes can reduce their impact. Here’s what to avoid:
- Poor Lighting: Avoid harsh shadows or low-light conditions. Use natural light or soft LED lighting for a balanced look.
- Shaky Hands: Blurry photos ruin product details. Use a tripod or a stable surface for sharp images.
- Cluttered Backgrounds: A distracting background shifts focus from the product. Stick to clean, neutral, or branded backdrops.
- Ignoring Camera Settings: Adjust focus, exposure, and HDR settings instead of relying on auto mode.
- Overediting: Avoid excessive filters and unnatural enhancements. Keep edits subtle to maintain product authenticity.
- Wrong Angles: Use different perspectives to highlight the product’s best features instead of a single flat shot.
- Not Cleaning the Lens: Dirty lenses lead to blurry or hazy images. Wipe it before every shoot.
Conclusion
Mastering phone product photography is all about using the right techniques, lighting, and editing tools to create high-quality images that attract customers. By optimizing natural light, using a tripod, selecting the right angles, and leveraging editing apps, you can achieve professional-looking product photos without expensive equipment. Avoid mistakes like poor lighting, shaky hands, and cluttered backgrounds to enhance clarity and visual appeal. Whether for eCommerce, social media, or marketing, well-shot product images improve engagement and boost sales. Start practicing these strategies to create stunning, high-converting product photos with just your smartphone. Try tools like Smartli for optimizing your product photos and its listing.
FAQs About Product Photography Setup
What is the best way to take product photos?
The best way to take professional product photos is by setting up a clean and well-lit shooting space. Use soft natural light or diffused LED lighting to reduce harsh shadows and highlight details. A neutral or white background keeps the focus on your product, while a tripod ensures sharp and steady images. Capture photos from multiple angles such as 45°, flat lay, and close-ups to show depth and variety. Finally, edit your photos using tools like Lightroom, Snapseed, or Smartli to enhance clarity, balance colors, and maintain consistency across all images.
How do you take production photos?
To take engaging production photos, focus on authenticity and storytelling. Use a good-quality camera or smartphone to capture different stages of your manufacturing or creative process. Ensure your space is well-lit to bring out natural tones, and take a mix of wide and close-up shots to show both the environment and finer details. Including elements such as tools, materials, and workers makes the photos more genuine and relatable. Edit your images for color balance and contrast to create a cohesive visual narrative that fits your brand’s aesthetic.
How do I make a professional product image?
Creating a professional product image starts with good lighting, a clean backdrop, and sharp focus. Use a white or neutral background to highlight your product, and shoot near soft, diffused light to prevent unwanted shadows. Capture several angles and ensure each shot maintains color accuracy. After shooting, use editing software like Photoshop, Canva, or Smartli to refine brightness, remove distractions, and enhance the image’s overall appeal. Always resize and compress images for the web to improve loading speed without sacrificing quality.
What is the golden rule of product photography?
The golden rule of product photography is consistency. Keeping your lighting, background, and camera settings uniform across all photos creates a cohesive and professional look. Use soft lighting, clean backdrops, and steady framing for every shot. Avoid over-editing — subtle adjustments for brightness, sharpness, and contrast are enough to make your product stand out. A consistent product photography setup not only looks more professional but also builds brand trust and recognition over time.
What lighting setup is best for product photography?
The best lighting setup for product photography combines natural and artificial light in a balanced way. Position your product near a large window for soft daylight and use a sheer curtain to diffuse harsh rays. Supplement with softboxes or LED lights when shooting indoors to maintain even illumination. Place your main light source at a 45° angle to create natural depth and avoid flat images. Using reflectors or bounce boards helps fill shadows and achieve smooth, consistent lighting throughout your shoot.
Can I create a product photography studio at home?
Yes, you can easily build a DIY product photography studio at home using affordable materials. Choose a quiet corner with natural light, use a plain white sheet or paper as your backdrop, and set up an inexpensive LED or ring light for better control. A small table, tripod, and reflector can complete your home studio setup. With consistent lighting and thoughtful composition, you can achieve professional-quality images without needing a commercial studio space.
How do I edit product photos professionally?
Editing is the final step in creating polished, high-quality product images. Begin by adjusting exposure, brightness, and color balance for a natural look. Use tools like Smartli, Photoshop, or Lightroom to remove backgrounds, retouch imperfections, and enhance details. Consistency in tone and color helps your catalog look cohesive. Batch-edit multiple photos with the same settings to save time and ensure a professional, branded appearance across your online store or social media platforms.


.avif)